Sunday, July 29, 2012

Cirque Debris


Today I have another pretty polish from Cirque! Debris is a black and white hex glitter with black square glitter... Or at least that was what I thought until I saw it under bright light: it contains holographic glitter (similar to China Glaze Fairy Dust)! I used two coats above, over Cult Nails Deal With It. Top coat was a must, to smooth the glitter down. I found it necessary to shake the bottle a couple of times because the large glitter particles tend to sink to the bottom of the bottle. Other than that, the polish was amazing. I can't wait to use Debris again!
Cirque Debris is available at cirquecolors.com, for $12.

Tuesday, July 24, 2012

Cult Nails Coco's Untamed (3/5)

Yesterday, my order for some of Cult Nails' newest colors arrived. *insert squeal of joy* I got Annalicious, Deal With It, and Untamed. I decided to pass on the other shades of the collection as I'm not a big fan of glitter or purple. The collection that these colors belong to is Coco's Untamed, which is the collection Maria's daughter (Coco) created.
I'll start this post with my favorite, Annalicious.


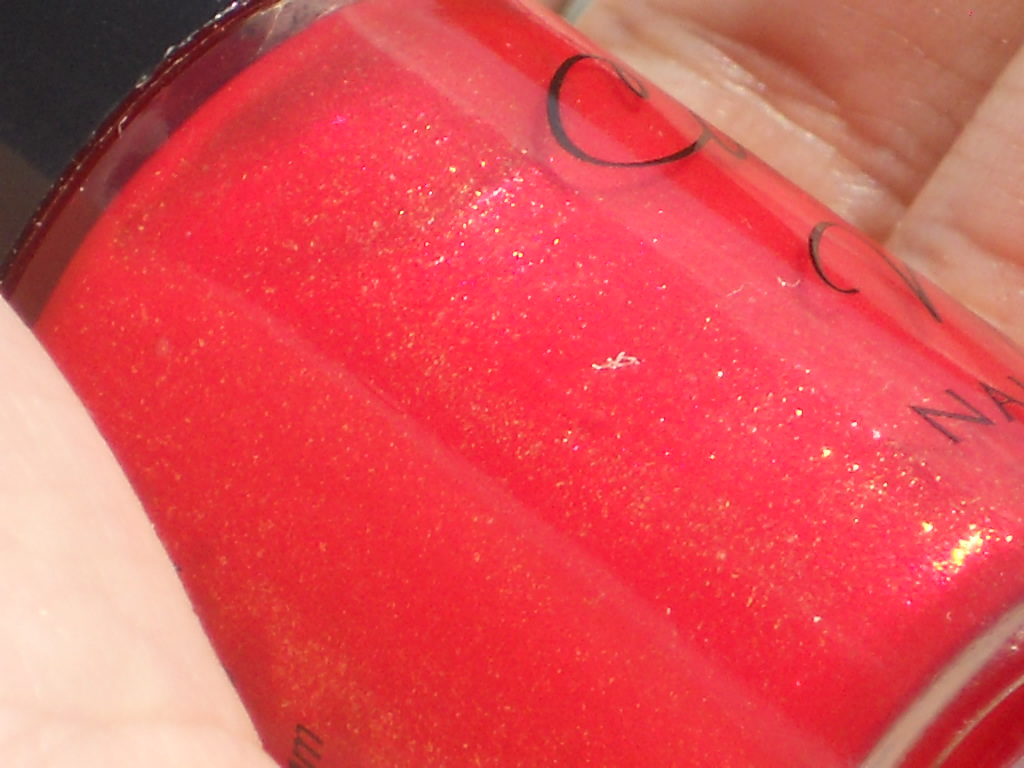
Annalicious is a fiery red jelly packed with small golden flakes. Saying that it glows is like saying the sun is bright. It is opaque in one coat, though I used two in the pictures (force of habit) plus top coat. The formula was perfect, the polish applied like butter, and the consistency wasn't too thick or too thin. When I first saw pictures of it, I wasn't sure if I needed it. I have a large collection of shimmery reds so I didn't think this would be any different from the rest of them. I was wrong. Annalicious is the ultimate shimmery warm red. It's what I wanted RBL Poppy to be and it's definitely a must have for anyone.
Next, Deal With It.


Deal With It is the brightest green I own. I tried to capture it in different lighting because it just looks so unusual and bizarre. It's a yellow green shade full of golden shimmer that dries to an non glossy finsh, so top coat is a must. Formula wise, Deal With It was sheer and on the thick side. I used 3 thin coats in the pictures below, and found the polish hard to control at times. I'd advise others to use thinner if they get this polish. Even though the formula leave much to be desired, I still love Deal With It. I don't usually wear very bright shades, but something about this shade caught my eye. I'm fascinated by it: it's one step a way from being a neon, which I hate wearing (they make my hands look jaundiced, not very flattering), but it just looks so fun! I don't know how to explain it, but I do love ogling my nails when I'm wearing this.
Finally, here's Untamed


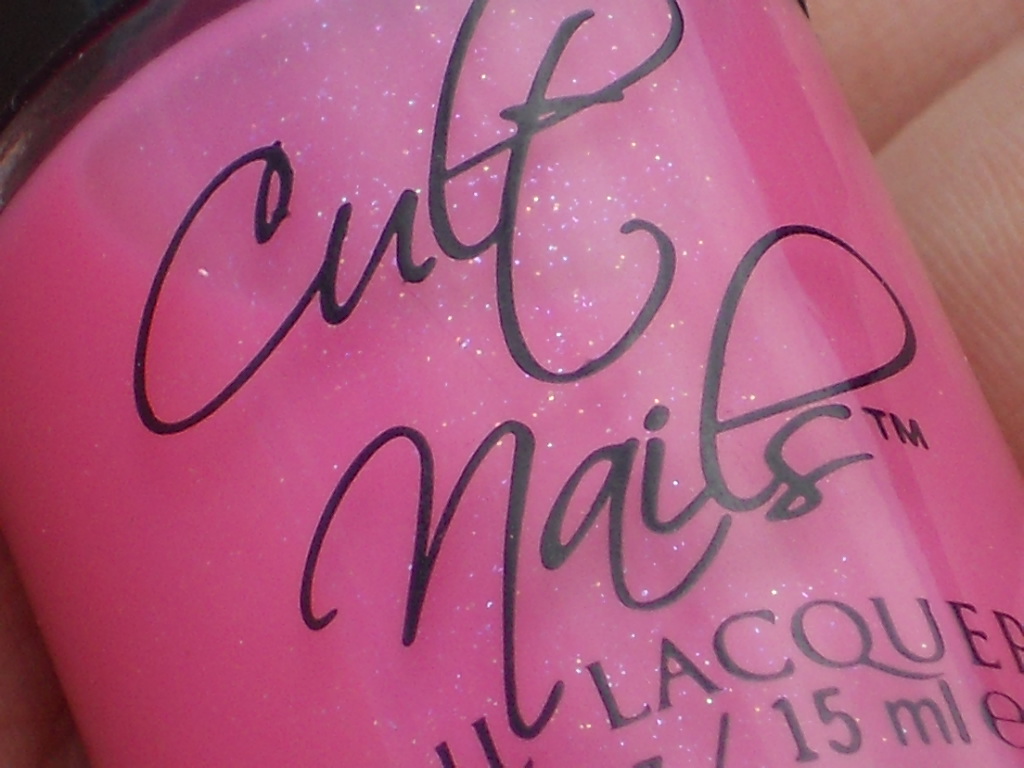
Untamed is a cool bubblegum pink jelly with suspended blue micro glitter. It's ... nice? I'm conflicted. On the one hand, I love jellies and bright pinks, but on the other this shade is more sheer than I would like to see in a jelly and I could probably find quite a few dupes for this shade of pink. I used 4 coats and top coat, as Untamed dries to a slightly gritty finish due to the glitter. The formula was sheer but not too streaky. I don't dislike this, but I don't like it either. I'd rather stick with OPI's If You Moust, You Moust.
Overall, I'd recommend getting Annalicious (great formula and color) and Deal With It (original, fun color). Untamed gets a meh from me; if you love bright pink jellies, get it, if not, don't. Cult Nails are available here for $10.


Sunday, July 22, 2012

Cirque Never Nude


The sun wasn't out today, so I wasn't able to truly capture the beauty of this polish. This is Cirque Never Nude, part of the same collection as Tibetan Nights. Never Nude is a bronze beige linear holo that dries to a semi gritty finish. Top coat is a must if you want your nails to be smooth to the touch. I used two coats for the pictures above, without top coat. Unlike other holos I've tried, I actually like the way Never Nude looks when the lighting makes it look flat (when it doesn't look holographic). Never Nude is a very pretty shade, and dried lightning fast. I think this would look good on everyone - it's a neutral-warm shade that would compliment any outfit without looking out of place.
Never Nude can be purchased here for $16.

Friday, July 20, 2012

A Story on Nail Art and Tips

*Tips are at the end of the post*


Let me start this off by saying that I have little to no skill/experience in nail art. In fact, up until today, the only kind of nail art I've attempted was water marbling. I've always found that doing my nails helped me relax. Somehow I figured that doing nail art would give me the same feeling. So I decided to watch a few videos on YouTube to familiarize myself to the process before I tried doing my nails. I wasn't 100% sure I would get a good result, but I figured I had a decent chance to get it right. And if I fail, it wouldn't be a huge deal; it was only nail polish, right? With that mentality, I started my first attempt. Surprisingly enough, it went very well,  and I garnered quite a few compliments while I wore it. Incensed by my successful first attempt, I decided to do another water marble. After all, I was able to get a very good result the last time I tried it; surely my second experience would be even better! With that in mind, I started to go through the steps again. I messed up a few nails along the way, which did irk me a little, but what the hey, it's only nail polish! So I removed the duds and redid them until I was satisfied with the result. And then I smudged a nail while putting away my supplies. My right eye developed a tic at that point, and I took out my supplies once more. I can be a perfectionist at times, and this was one of those times I had to have perfect. I was under the impression that I just had to redo one nail, and then everything would work out. And you know what? I was right, I was so right that I only had to redo that one nail nine fucking times. Insert a giggle of hysteria. By the end of it I had a headache due to the fumes I inhaled (I spent 1/2hr doing nine nails, 2 1/2 doing the leftover one all in a closed space) and I was halfway into getting a panic attack from the entire experience. Needless to say, any logical person would avoid doing a water marble for a while. From the fact that I took five times as long to do one nail compared to an entire manicure, you might get the idea that logic isn't exactly my forte. I'd defend myself saying that I am a very logical person, but there would be no point as I decided to try water marbling a third, fourth, and fifth time. All ended in the same way as attempt number two. At some point I decided to stop. It was just nail polish... so I tried it one last time. Laugh at me if you will, but my sixth attempt was gorgeous. It was a-ma-zing. A warm feeling started to spread through my body. Is that what happiness felt like? Finally, I was able to reproduce a successful water marble without messing up too much. My stress began to melt away. I started to relax. And then I realized I had the SATs the next day. I closed my fist in frustration and banged it on the table. I discovered my nails weren't as dry as I thought. That eye tic came back.
The End.
***
Ever since then, I became a little wary of all things nail art (including Konad, but for a different reason). I admired it on other people but told myself that I would drive myself insane if I tried to reproduce any of the things I saw on others. But then I came across this tutorial. My curiosity led me to try it out after a few weeks of hesitation (what the hey, it's just nail polish!) and I have to say that I like the way it turned out. It was easy, took little time, and looks great. Will I try it again? Hell no. The last thing I want to do is ruin this the way I ruined water marbling. 
I used (L to R) a-england Bridal Veil, a-england Saint George, Nubar Reclaim. I sponged OPI DS Sapphire on the tips.
***
I tried a creme gradient and a holo gradient and found that holos have a smoother transition when sponged on another holo. I found that a sheer linear holo like DS Sapphire sponged on another more opaque linear holo like Reclaim gave the best gradient like effect. When sponged on a scattered holo, the effect can be a little harsh. They all look good under bright sunlight, but in an area that is not brightly lit, I'd go for linear on linear.